有一段时间没有更新博客了,前几天突发奇想想试着弄一个小绿锁(其实就是想装逼),花了点时间各种Google各种研究之后决定顺便就启用Http/2。
关于HTTP/2
15年9月,Nginx官方发布了这样一篇文章,Open Source NGINX 1.9.5 Released with HTTP/2 Support,这也就意味着我们可以更新自己的Nginx版本来愉快地使用HTTP/2了。关于HTTP/2的详细信息,我从官网上取了一段下来:
HTTP/2 is a replacement for how HTTP is expressed “on the wire.” It is not a ground-up rewrite of the protocol; HTTP methods, status codes and semantics are the same, and it should be possible to use the same APIs as HTTP/1.x (possibly with some small additions) to represent the protocol.
The focus of the protocol is on performance; specifically, end-user perceived latency, network and server resource usage. One major goal is to allow the use of a single connection from browsers to a Web site.
升级Nginx
一般apt-get、yum等方法使用的是官方源,版本太低并不支持HTTP/2。所以如果想像我一样使用apt方法升级Nginx,需要添加一下source源。
根据Nginx官网的下载文档。 Debian/Ubuntu 用户需要先安装apt源的签名key:
1 | sudo apt-key add nginx_signing.key |
然后根据自己的系统版本号将下面代码的system,和codename替换掉,添加进自己的source源/etc/apt/sources.list的末尾:
1 | deb http://nginx.org/packages/mainline/system/ codename nginx |
如我的系统Ubuntu14.04,我添加的源为:
1 | deb http://nginx.org/packages/mainline/ubuntu/ trusty nginx |
添加之后:
1 | apt-get update |
如果一切正常,那么Nginx应该已经升级到最新版了。
开启HTTP/2
尽管HTTP/2没有强制要求加密,但是目前的实现只有HTTPS,因此,我们同样需要创建公约密钥。使用 Let's Encrypt 来生成证书是一个不错的选择。
安装、生成证书
执行以下命令:
1 | git clone https://github.com/letsencrypt/letsencrypt |
我执行最后一句的时候,一直报出如下错误死活特么解决不了: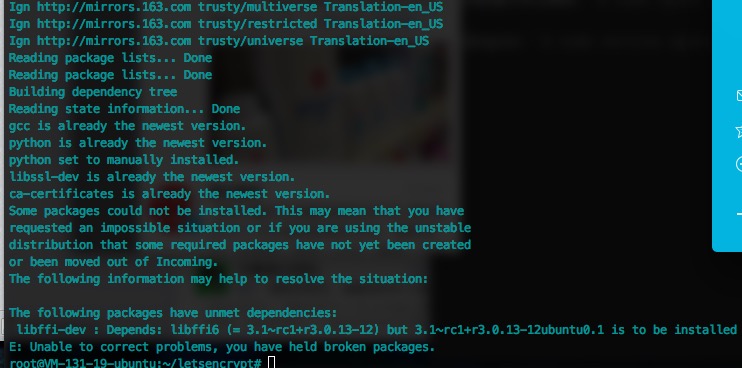
无可奈何,找出@smalinuxer大神帮忙,最后他两句话就给我解决了。。原因不详,也可能是脸的问题
1 | sudo apt-get remove libffi6 |
安装完成后会自动运行,大致显示这样的界面: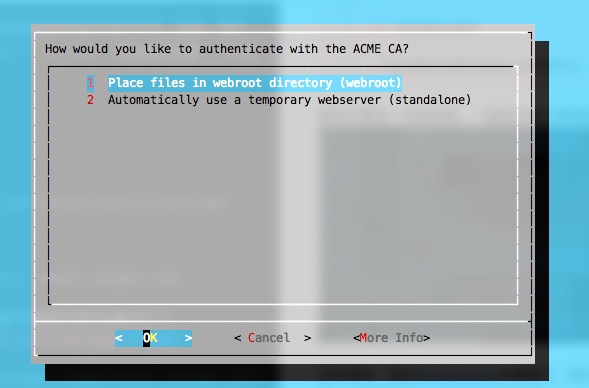
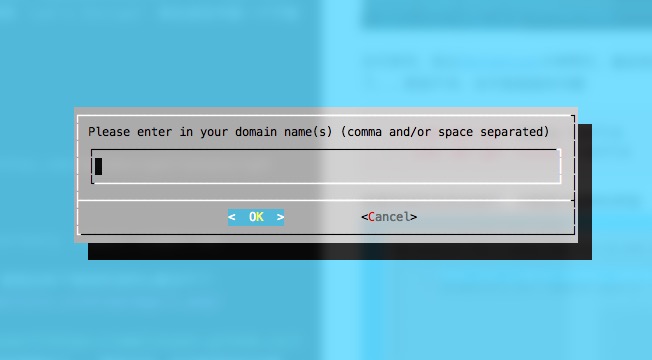
然后输入你要认证的域名,如果有多个用空格隔开。证书生成成功之后会出现congratulation字样,可以在/etc/letsencrypt/live/yourdomain.xx/下找到。
更新证书
证书的有效时期只有3个月的样子,快过期的时候会有邮件提示,这个时候你除了可以选择用上面的方法重新生成证书
以外,也可以使用 ./letsencrypt-auto renew ,不过这个方法我还没有试用过
修改配置
Nginx升级了,证书也有了,接下来只需要配置好就能开(Zhuang)心(Bi)的使用https://访问你的网站了。
1 | server{ |
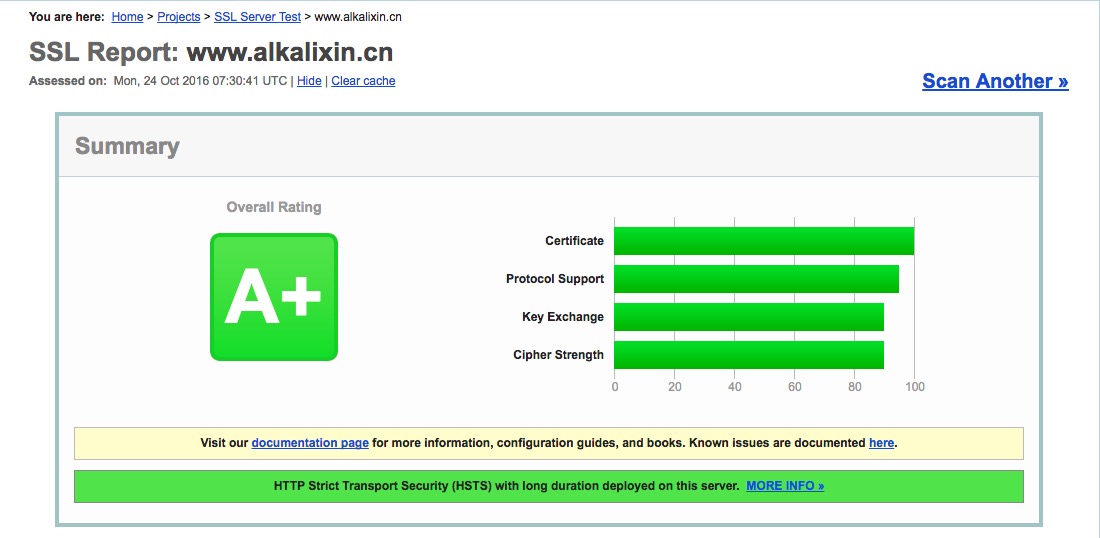
保存退出,重启服务器,在地址栏看到小绿锁以及 protocol 栏里看到h2,表明我们成功启用HTTP/2了。最后贴上一张我在ssllab上测试的结果图